If there is one snack my family cannot get enough of, it is chips and fresh homemade salsa. It was game over the minute I taught my kids how to melt shredded cheese onto tortilla chips in the microwave. Hint: If there is one way to make a healthy snack like chips and salsa into a very unhealthy snack, just add shredded cheese and sour cream. You’re welcome.
My love affair with salsa goes back to my own childhood, but I didn’t develop my deep appreciation for it until after high school.
I had a favorite Mexican restaurant.
I don’t mean some Americanized chain restaurant. This was the kind of hole-in-the-wall place you went to when you wanted real Mexican food. Or at least as real as it got in central Ohio.
And the main attraction was their salsa. I could drink their salsa.
It wasn’t just that the salsa tasted good (and it did taste really good), but it was also the texture.

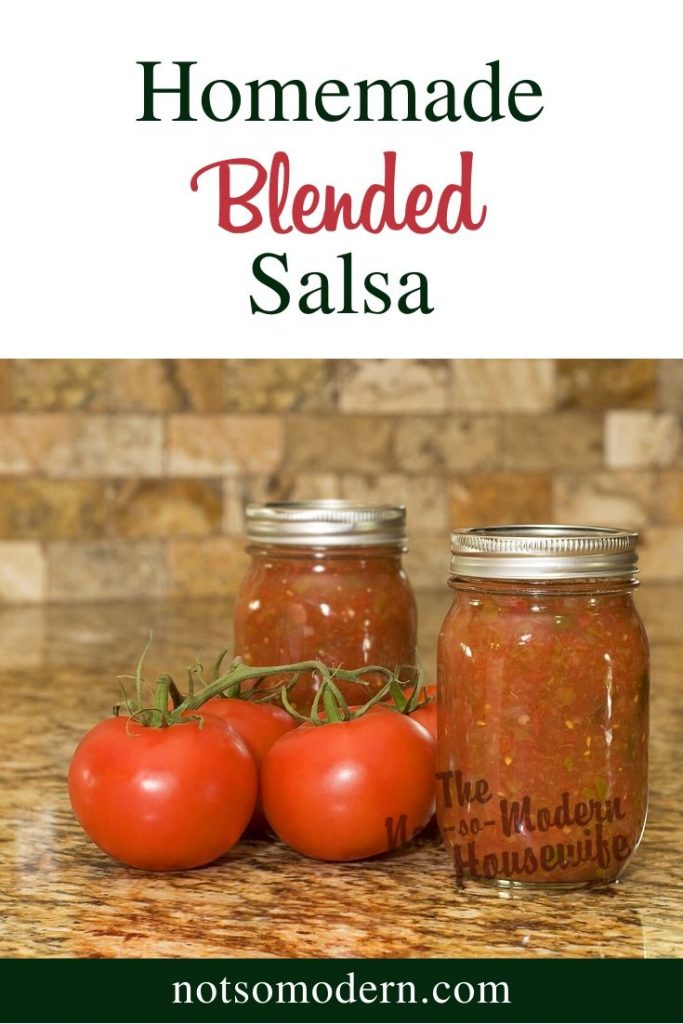
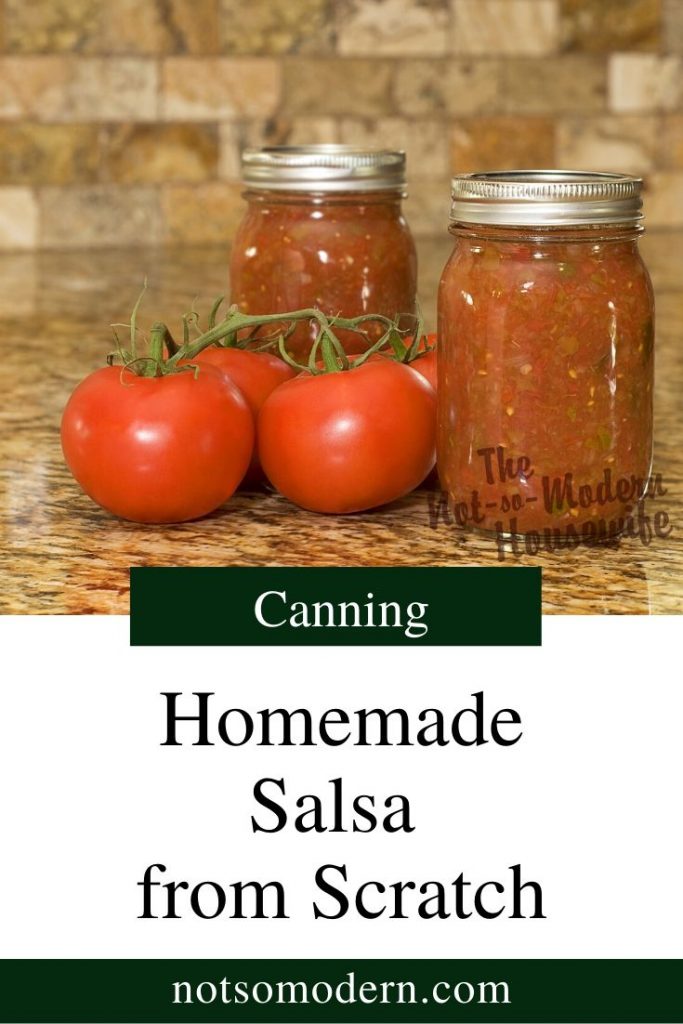
This wasn’t a chunky salsa, but it also wasn’t thin and runny. It was blended just enough that you got a little bit of every salsa ingredient on every chip.
I needed to find a way to have access to this salsa all the time. None of the store bought salsa I tried could even come close.
Unfortunately for me, neither my wallet nor my pocketbook could afford for me to eat there all of the time.
It turned out to be a rather convenient coincidence that I had become actively involved in canning and gardening at the time.
It was also rather convenient that I had more tomatoes than I knew what to do with.

I started canning my own homemade salsa recipe and my world was changed forever.
I remember those first salsa recipes, arguing with my mom about what constituted “spicy.” Hint: she doesn’t like spicy food. All of it was too spicy for her.
These were the good ole’ days before the internet and “tested safe canning recipes.”
Thankfully, we do have tested safe recipes now. This recipe is an adaptation from the recipe I got from the National Center for Preserving Food website.
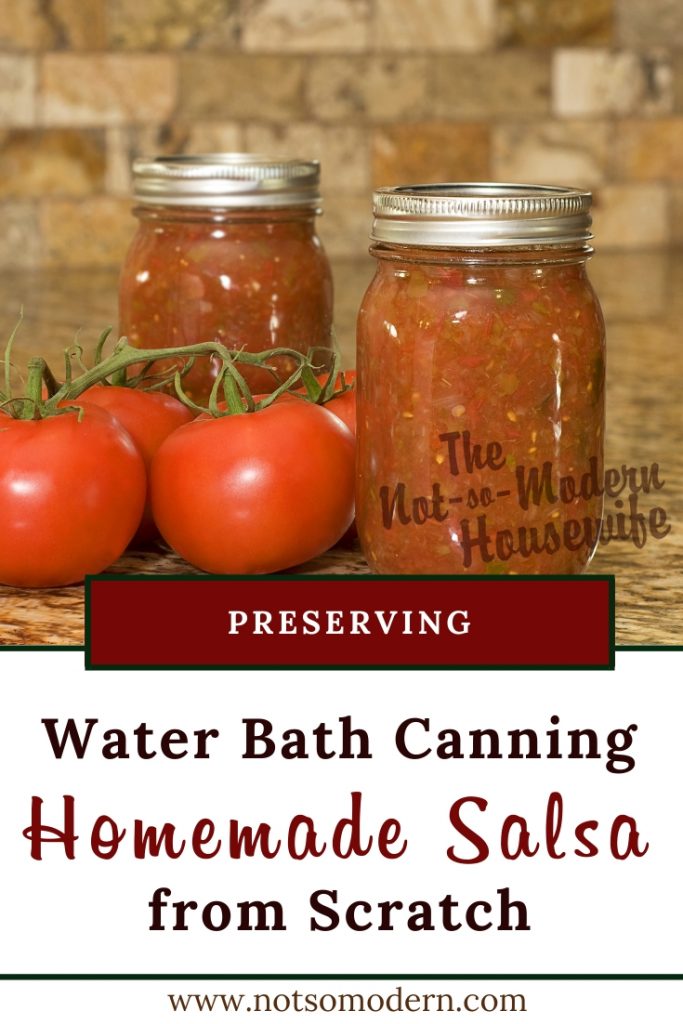
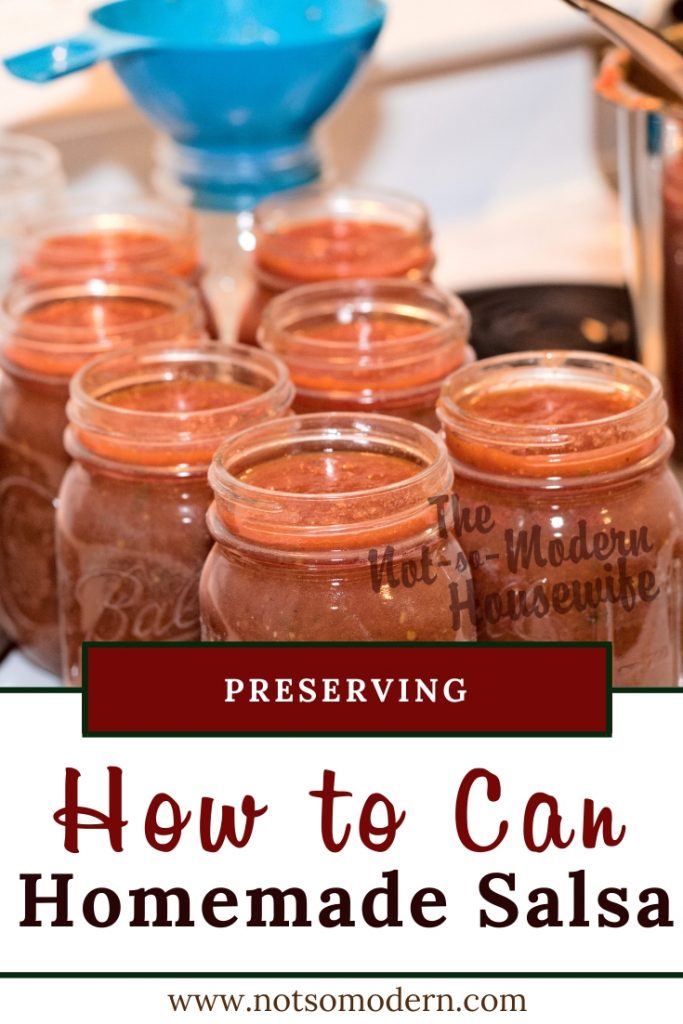
If you are looking for a delicious and safe salsa recipe to can at home, look no further than this fantastic restaurant style salsa recipe. It is the best homemade salsa recipe I have ever tasted, and it is also safe for water bath canning.
So go ahead and give it a try, you won’t be disappointed!
Table of Contents
Pin for later:

Tips for Perfect Homemade Salsa
Ripe tomatoes are key to getting the best flavor in your salsa. You can also use canned tomatoes or diced tomatoes for convenience and a consistent flavor. This recipe uses paste tomatoes because they are meatier and have less juice. This gives the salsa the best consistency.
You can use slicing tomatoes for your salsa, but they will be runnier, so you may need to cook your salsa longer to get the desired consistency. For a deeper flavor, consider using fire roasted tomatoes.
To make a spicier salsa, leave the seeds in the hot peppers. For a milder salsa, remove the seeds.

Use an immersion blender to blend the salsa to your desired consistency.
For the best flavor, allow your salsa to sit for at least 24 hours before eating. This allows the flavors to meld together. Adding fresh cilantro can enhance the flavor of your salsa.
Salsa is one of the most popular canned foods because it is so versatile. Salsa can be used as a dip, on tacos, or as a sauce for enchiladas or huevos rancheros.
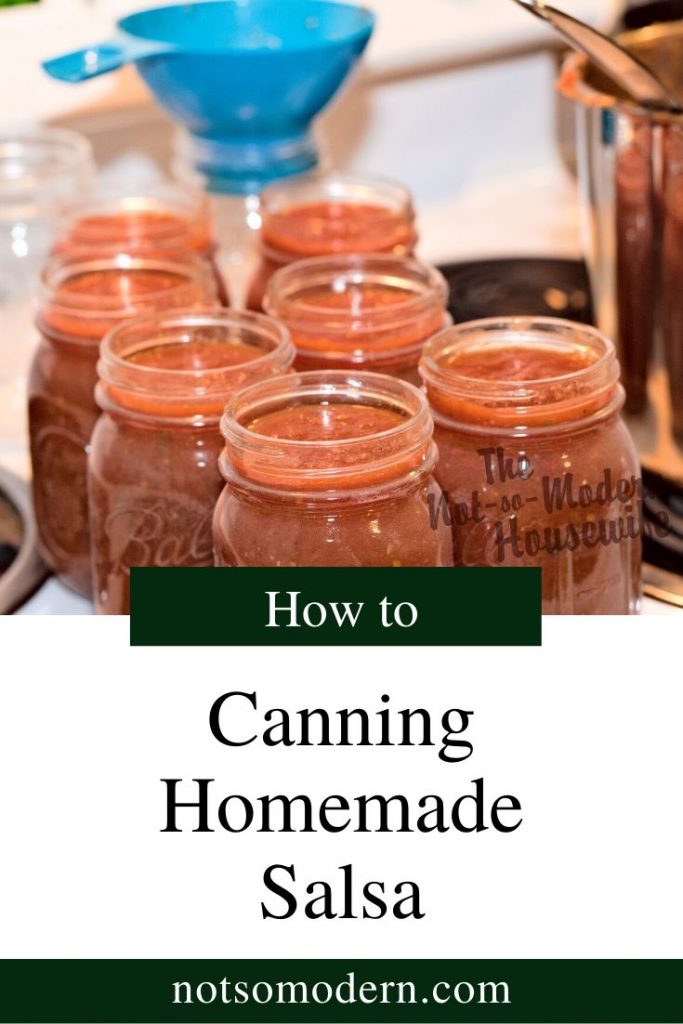
This recipe makes enough salsa to fill 7-8 pint jars. If you don’t want to can your salsa, you can store it in the fridge for 5-7 days. Adjust the flavor by adding more lime juice if needed.
Delicious homemade salsa is a great gift for the foodies in your life. Be sure to include the recipe so they can make more!

Is Salsa Healthy?
Fresh salsa is a healthy food because it is low in calories and fat, and high in vitamins and minerals.
Tomatoes, the main ingredient in fresh salsa, are an excellent source of vitamin C and lycopene. Lycopene is a powerful antioxidant that has been linked to a reduced risk of cancer.
How Long will Homemade Canned Salsa Last?
If properly canned and stored, your salsa will last for 12-18 months. Canning salsa is a great way to preserve the tomatoes from your garden. Using Roma tomatoes can enhance both the preservation and flavor of your salsa.
Cooked homemade salsa can last 5-7 days if kept in an airtight container in the refrigerator.
Homemade salsa can also be stored in the freezer for 4-6 months.
How to Freeze Homemade Salsa
Homemade salsa is usually made without preservatives, but it’s still safe to freeze. The ingredients are already blended, so the texture of the salsa doesn’t really matter when it’s frozen and defrosted. However, the color or appearance of the side dish may change slightly. The salsa could turn soggier or a little watery after being frozen.
For added depth of flavor, consider using fire roasted tomatoes in your salsa recipe.
Prepare the salsa as you normally would. Allow the salsa to cool completely before packing it for storage. To thaw quickly, divide the salsa into equal portions and store in a freezer bag (or airtight container). Before closing the bag, squeeze out as much air as possible. Place flat in the freezer after writing the expiration date.

Peeling Fresh Tomatoes and Peppers in Bulk
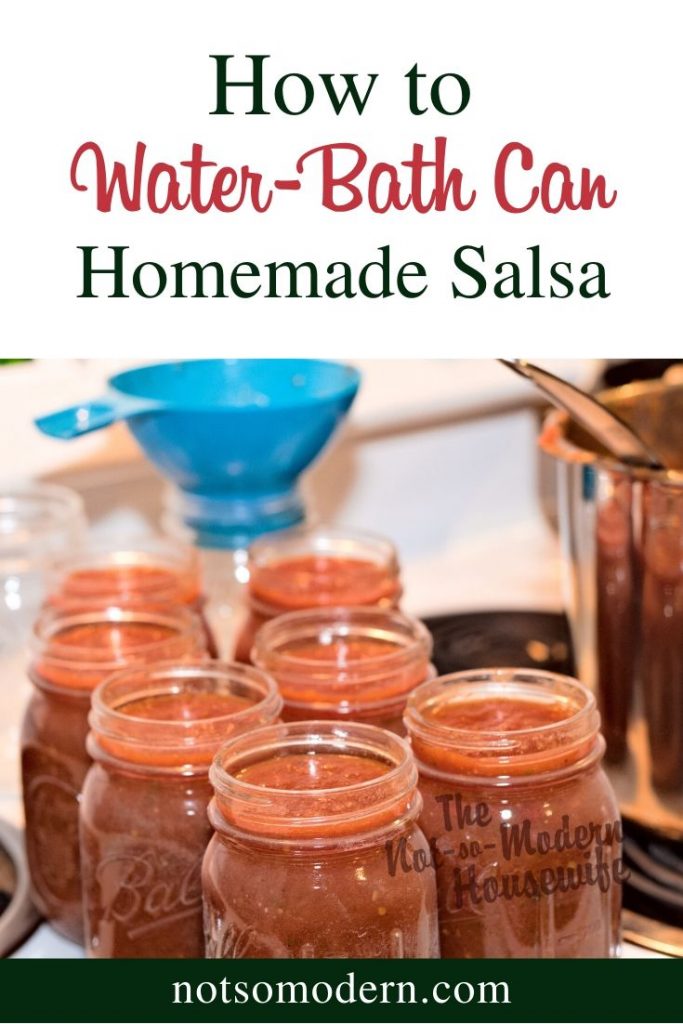
This recipe uses roughly 16 pounds of fresh tomatoes to make homemade salsa. That’s a lot of tomatoes to peel and chop in addition to all of your other vegetables. You also need to set up your canner, sterilize your jars, and prepare your other supplies.
The poblano peppers also have a thick skin that needs to be removed.
Getting everything done while also blanching and skinning tomatoes is almost impossible.
One canning hack I have learned is to roast the tomatoes and peppers in the oven to help remove the skins.
Roasting the tomatoes and peppers in the oven for about 20 minutes will cause the tomato skins to split and the pepper skins to char. The peppers will need to sweat in an airtight container for a little while to cause the skins to separate from the “meat” of the pepper.

The tomato skins on the other hand easy separate when the tomatoes are placed in a sink of ice water. Simply slide the skins off of the tomatoes and transfer them to a bowl to wait for you to chop them.
You’ll then want to measure the tomatoes as you chop them and before you place them in your stock pot to cook the salsa. 3.5 quarts of tomatoes is equal to 14 cups. Measuring your ingredients ensures you maintain the correct acidity for safe water bath canning.
You can change the seasonings in this recipe without affecting the acidity level. This recipe has a good bit of cumin in it, which gives it a bit of a chili flavor. You can decrease the amount of cumin and increase the amount of cilantro if you prefer more of a cilantro flavor.
However, you cannot decrease the number or ratio of onions or peppers. This will change the acidity of the recipe and may make it unsafe for water bath canning.

4 Tips for How to Can Salsa
This recipe is able to be canned in a water bath because it has a high acid content. This homemade restaurant-style salsa is fresh, spicy, and addicting, making it a healthier, homemade alternative to store-bought salsa.
- It is important that you keep the same ratios of tomatoes, onions, peppers, and lemon juice to maintain this acidity.
- The recipe calls for bottled lemon juice to ensure consistent acid levels. Fresh lemon juice may not be the same acidity, so it’s important to always use bottled lemon juice.
- Also, this recipe is written for lemon juice, so vinegar cannot be substituted.
- You can change the types of peppers as long as you still have the same volume of peppers in your finished product. This way you can tailor your homemade salsa recipe to the flavor and heat that you prefer.
I substituted long green chili peppers for poblanos. I like the flavor of poblano peppers, and they are a little more mild in terms of heat. You could even use green bell peppers if you find this recipe to be too spicy.
My family did not notice any spice with this recipe, and my kids tend to be very sensitive to spicy salsa.
Is Canning Difficult?
When people hear things like “tested safe recipes” or the fears surrounding food safety, they tend to become overwhelmed with the idea that canning is complicated.
The truth is that it really isn’t complicated, especially if you’re just getting started with water bath canning.
If anything, I feel like the current standards make canning less complicated. Can’t get much simpler than following a tested recipe.

Can You Get Botulism from Canned Salsa?
Food safety is a funny thing.
What if I told you that you have a natural resistance to e-coli? What about salmonella? Oh, or the dreaded botulinum?!
Every day, we come into contact with thousands of strains of bacteria on every surface we touch. And yes, sometimes those same organisms commonly associated with food poisoning.
But why don’t I get sick?
The bacteria in your home is unique to your home. It’s unique to your family. I bet Grandma licked the spoon when she was preparing Thanksgiving dinner too.
But I bet she didn’t lick the spoon when she was cooking for the church pot luck. Or at least let’s hope not.
Part of the problem is when you’re sharing food with people who aren’t immune to your “family germs.” Your family is healthy, but your friend gets sick because they don’t have an immunity built up to the same bacteria.
Then there are the cases where there is an overload of bacteria. Even if you have an immunity, an overload may be more than your body can handle.
This is also why people with suppressed immune systems are considered an “at risk population.” Any level of bacteria can be an overload if you don’t have the immune system to fight it.
This is where botulism comes in. Botulism tends to be our greatest concern with regards to canning.
As a bacteria, botulinum can be found on any surface, so there is no way of knowing if it is present on foods that we are canning.
Botulinum itself isn’t toxic. The concern comes in when the bacteria multiply and release the neuro-toxin that causes botulism.
What we do know is that botulinum and its toxins cannot survive in acidic environments or temperatures over 240° F.
This is why it’s so important that water bath recipes are tested to ensure they are acidic enough to prevent the growth of botulinum and the production of botulism toxin.
As for heat killing botulinum spores, boiling water only reaches 220°. Pressure must be applied (such as in a pressure canner) in order to reach 240° F.
Now, botulism is rare and there’s a good chance it isn’t in your canned goods. However, the toxins are odorless and tasteless. There is no way to differentiate from what is safe and what is not. Are you willing to take that chance? Are you willing to gift your canned goods to someone else if there is a chance it isn’t safe?
What Do You Need to Start Canning?
Learning to can is a necessary step to becoming a producer instead of a consumer.
Before you get too worried about all of the new supplies you’re going to need, know that water bath canning (the type of canning we’re using in this recipe) requires very little special equipment.
You can use a stock pot as long as it’s deep enough to submerge the jars with at least an inch of water covering them.
Your canner should also be wide enough to process all of your jars at the same time.
I canned for years without a funnel or jar lifters.
Knowing now how inexpensive they are, I realize I was crazy for struggling as long as I did, but it is possible.
You’d be amazed what you can accomplish with a ladle, a pair of tongs, and a kitchen towel.
You’d also be amazed at the mess you can make.
Here are some of the basics I recommend:
Upgrade Options:
Canners take up a lot of space in your kitchen. If you’ll be doing any pressure canning in the future, you may want to go ahead and invest in a pressure canner.
They are large enough to be used as a water bath canner, but are also designed to be safe for pressure canning. It’ll save you from needing to store two very large pots.
The first time you buy jars, they will come with seals and rings, but the seals are only good for one use. Next time you can, you’ll need to buy new seals. You can also buy new rings if your old ones get rusty.
Final Thoughts
This fresh salsa recipe for homemade salsa is perfect for canning, as it yields a restaurant-quality salsa that will be safe to eat.
The salsa can be made with different types of peppers, but the ratios of vegetables must stay the same in order to maintain the correct acidity levels. The lemon juice and spices can also be adjusted to taste.
After canning, the salsa will last for up to a year when stored in a cool, dark place. Be sure to label the jars with the contents and date of processing so that you can keep track of how long the salsa has been canned.
Enjoy with tortilla chips or your favorite Mexican food!

Homemade Salsa Recipe for Canning
Ingredients
- 3 1/2 qts peeled, cored, chopped paste tomatoes (~16 lbs fresh tomatoes)
- 2 c seeded, chopped poblano peppers (~6 peppers)
- 1/4 c seeded, finely chopped jalapeno peppers (~8 peppers)
- 2 1/2 c chopped onion
- 3 cloves garlic, finely chopped
- 1 c bottled lemon juice
- 1 Tbsp salt
- 1/2 Tbsp black pepper
- 1 Tbsp ground cumin
- 1 1/2 Tbsp oregano leaves
- 1 Tbsp fresh cilantro
Instructions
- Preheat the oven to 450° F.
- Spray a baking sheet with non-stick spray. Lay the tomatoes and poblano peppers onto the baking sheet and bake for 20 to 25 minutes until the skins begin to char and peal back.
- Carefully place the poblano peppers into an airtight container to allow them to sweat. This will make it easier to remove their skins.
- Allow the tomatoes to cool on the baking sheet.
- Meanwhile, fill your canner with water, 1 cup of white vinegar, and bring it to a low boil.
- Carefully submerge 9 pint jars into the water. Simmer the jars until ready to use.
- Wearing food safe gloves, remove the skins from the poblano peppers. Discard seeds from poblano and jalapeno peppers and rough chop.
- Remove seeds and skins from the tomatoes and rough chop.
- In a large saucepan, combine tomatoes, peppers, onions, garlic, lemon juice, salt, and pepper. Bring to a boil, stirring frequently.
- Reduce heat and simmer for 10 minutes, stirring occasionally.
- Add cumin, oregano, and cilantro.
- Using an immersion blender, blend the salsa until desired consistency.
- Simmer for 20 minutes, stirring occasionally.
- Using a jar lifter, carefully remove the hot jars from the water bath. Be sure to pour water that is in the jars back into the canner. Use tongs or a mitt as the jars are very hot.
- Using a funnel, ladle salsa into the jars until there is a 1/2 inch headspace.
- Lightly tap the jars or use a spoon to remove any air bubbles from the jars.
- Verify headspace and add salsa to jars as needed.
- If there is a partial jar that cannot be filled with a 1/2 inch headspace (there almost always is), place it in the refrigerator with a lid.
- Use a clean, moist paper towel to wipe the rims of all of the jars.
- Place a new seal on each jar and hand tighten a ring over each seal.
- Place the filled jars into the water bath canner using a jar lifter. Once all jars are placed in the canner, each jar should be covered by 1 inch of water. Add water as necessary by pouring boiling water around the jars. Do not pour water directly onto the jars.
- Turn the heat to its highest setting, cover the canner with its lid, and heat until the water comes to a rolling boil.
- After the water is boiling, set a timer for the required processing time. Recommended processing for pint jars: 0-1,000 ft above sea level - 15 minutes; 1,001-6,000 ft above sea level - 20 minutes; Above 6,000 ft above sea level - 25 minutes.
- Keep the canner covered for the processing time. The heat may be lowered as long as a boil is maintained for the entire processing time. If the water stops boiling at any point, it must be brought back to a boil and the time must start over from the beginning.
- At the end of the processing time, turn off the heat and remove the canner lid. Do not attempt to move the canner while it is full.
- Allow the canner contents to settle for 5 minutes, then remove the jars to a cooling rack. Space the jars 1 inch apart to allow for proper air flow.
- Allow the jars to cool for 24 hours. Do not tighten the rings or press on the seals during this time.
- Remove ring bands from sealed jars. Refrigerate any jars that did not seal. Place labels on jars with the content description and date of processing. Store in a cool, dry place out of direct light.
Notes
Salsa must be "hot processed," meaning the jars and salsa must be hot while they are filled, and they must be processed immediately. The jars and salsa cannot be given time to cool. If your canner is not large enough to process 8-9 pints at one time, you may need to cut the recipe in half. However, do not change the ratios within the recipe.
The peppers can be changed for other pepper varieties, but the volume cannot be changed. To achieve the proper acidity levels, the vegetable ratios must remain the same.
Slicing tomatoes can be used in place of paste tomatoes, but will need to be cooked down longer to achieve desired consistency.
This recipe calls for bottled lemon juice to ensure consistent acidity levels. It cannot be substituted for fresh lemon juice or vinegar.
The spices can be adjusted for flavor without affecting the acidity of the recipe.
Recommended Products
As an Amazon Associate and member of other affiliate programs, I earn from qualifying purchases.


Nutrition Information
Yield 64 Serving Size 1/4 cupAmount Per ServingCalories 7Total Fat 0gSaturated Fat 0gTrans Fat 0gUnsaturated Fat 0gCholesterol 0mgSodium 111mgCarbohydrates 2gFiber 0gSugar 1gProtein 0g