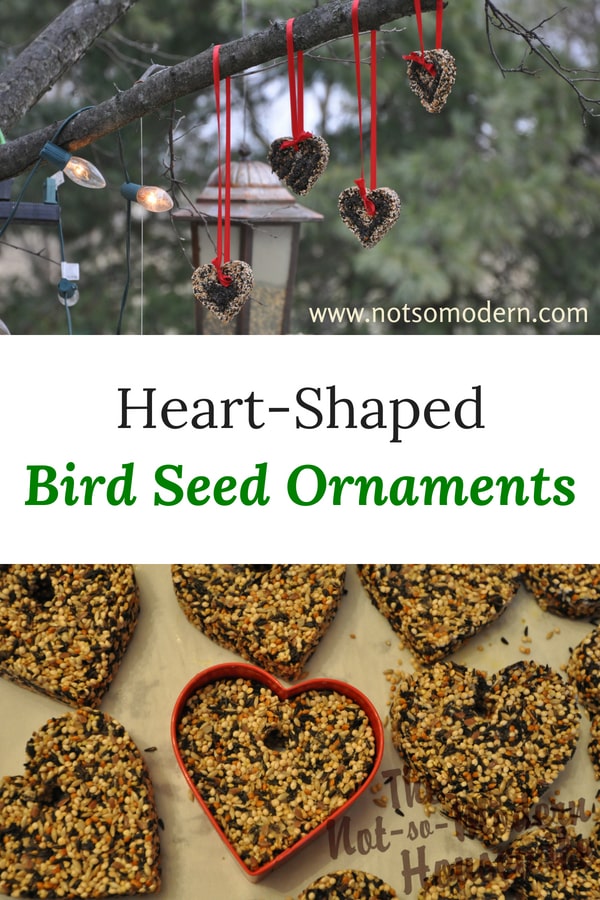
If you’re looking for a unique, creative way to decorate your yard this year, try these easy DIY birdseed ornaments.
You can make them in any shape you like – I chose hearts because I want my songbird friends some love!
You’ll need about 15 minutes of time and $5 worth of supplies to craft 12-14 ornaments.
They also make great gifts for teachers and parents who might be difficult to shop for this year.
One of my favorite things about living in the woods is that we have a wide variety of birds all year long. I love watching the different types of birds as they fly around outside my window or on our deck.
We also have a lot of trees, which means plenty of places for them to build nests and raise their young.
I like to attract the songbirds to my yard because they help to control outdoor pests like caterpillars, mosquitoes, and flies. They also provide us with beautiful songs and hours of bird-watching entertainment.
Attracting birds to our yards can help us enjoy some pest control and outdoor entertainment, while also providing them a safe place for nesting and raising their young.
You can make birdseed ornaments that will hang in your yard to attract birds. These are also a lovely addition to bird feeding stations and can be made into any shape you like. I’ve chosen hearts because I want to show my songbird friends some love.
Pin this craft for later:

How do I make birdseed ornaments?
Unflavored gelatin, corn syrup, and flour are the main components that help the birdseed ornaments to keep their shapes.
Gelatin needs to be soaked in cold water so it doesn’t clump. You’ll then want to heat it slowly over medium heat until it is completely dissolved.
Stir the gelatin mixture constantly until it begins to bubble and thicken.
Add the corn syrup to the boiling water and stir well. The mixture will continue to thicken as it cools down.

Choosing birdseed for your ornaments
You’ll want a small birdseed blend with seeds that are close to the same size to create a compact ornament that will keep its shape.
Large pieces like sunflower seeds could cause a gap in the ornament that makes it break and fall apart.
Most cookie cutters are also small and keep their shape better with small seeds.
If you’d like to offer treats to larger birds such as cardinals, bluejays, and blackbirds who enjoy sunflower seeds, try hanging pinecones coated in peanut butter and rolled in a wild birdseed mix that includes sunflower seeds and dried fruit.
Handling the sticky birdseed mixture
The ornament recipe is very sticky, so I recommend using a couple of greased, metal spoons to handle the birdseed mixture and put it into the molds.
You should grease your cookie cutters with coconut oil, cooking spray, or lard before you get started. You’ll also want to grease it a couple of times while you’re working.
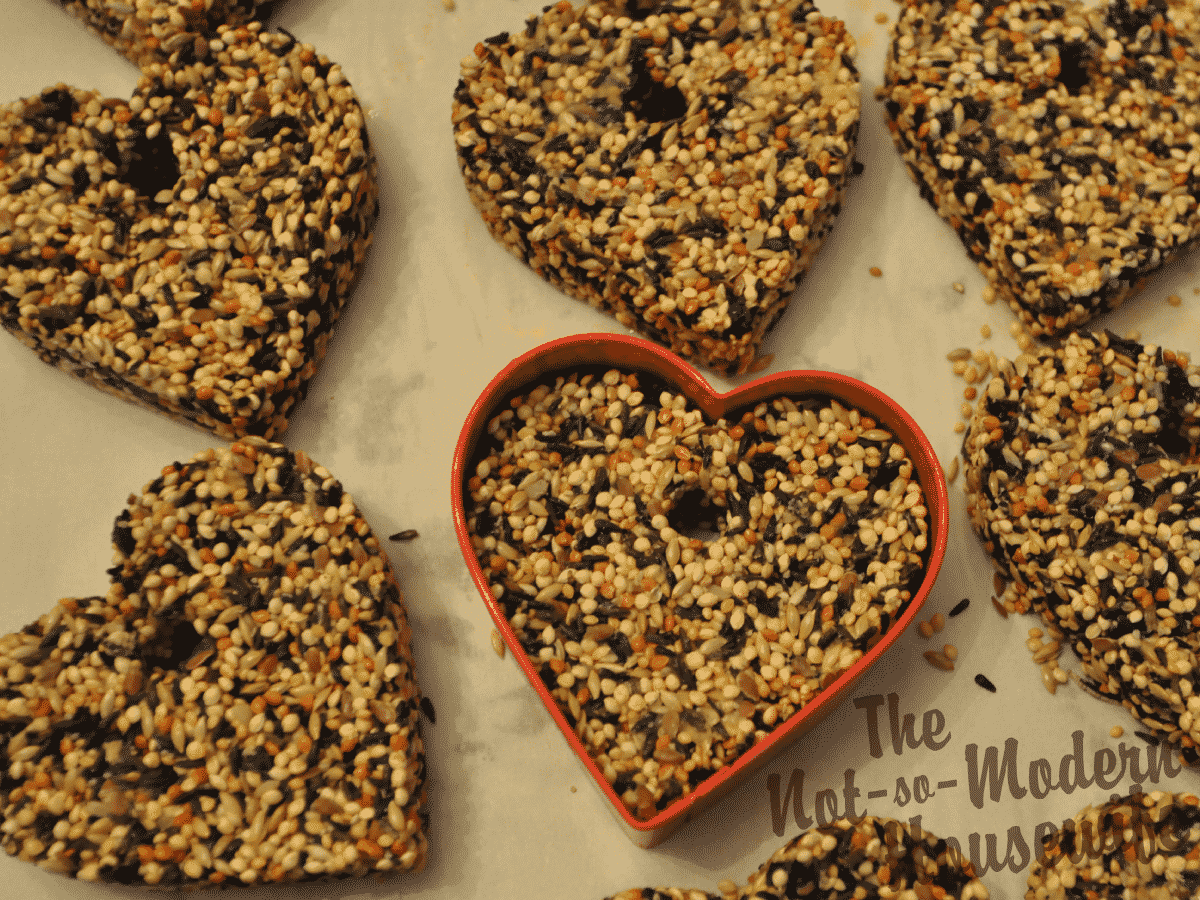
Set your cookie cutter on a baking or cookie sheet while you spoon the birdseed mixture into the mold. Use the back of the greased spoon to gently push the mixture into the cookie cutter and give the ornament its shape.
While the ornament is still in place, use a plastic straw to create a hole in the top of the ornament so you can hang it after it is dry.
You can then carefully pull the cookie cutter off of the birdseed ornament.

Making Bird Seed Ornaments with Kids
I always need more ideas for easy crafts to do with my family, and I was able to get my kids involved despite the stickiness of the birdseed mixture. They helped me with making the mix, filling the cookie cutter, and creating the holes.
Your kids will love getting involved in this project. Mine love any opportunity to decorate, as well as help animals. You can also let them choose their favorite cookie cutters to make their own custom birdseed ornaments.
Creative Ideas for Decorating Your Birdseed Ornaments
As an extra treat, I’ve decorated the ornaments with smooth peanut butter and Nyjer bird seed. The birdseed sticks easily to the peanut butter, but you may want to refrigerate your extra ornaments so the peanut butter stays firm before you hang them.
You can use a piece of twine or ribbon to hang each birdseed ornament. I prefer the look of the ribbon, plus it holds up a little better if you want to reuse it for future ornaments.

Ornament Drying Process
Using a parchment paper-lined baking or cookie sheet will allow you to move the ornaments out of the way while they harden for 4-8 hours.
The parchment paper will also keep the ornaments from sticking to the baking sheet so you can easily lift them away.
Leave the ornaments to dry in a cool area with good air circulation until they have fully hardened. I usually leave mine overnight so they are ready to put away in the morning.
Storing your birdseed ornaments
This recipe makes approximately 12 birdseed ornaments, so you will probably want to hang a few and keep the rest of the ornaments in storage until you are ready to use them.
Birdseed ornaments store best in an airtight container in the refrigerator. This will help keep them fresh for your songbird friends and keep bugs and pests from spoiling them.

Hanging your birdseed ornaments
Hang your birdseed ornaments outside in your homestead garden to decorate the area around your bird feeder, or anywhere your songbirds frequent. They can be used any time to provide birdseed outdoors, but especially in winter.
You can display the ornaments from trees that are otherwise bare of leaves and berries, and use them to make natural Christmas trees for the birds.
Perfect gift for parents, teachers, friends, and family
DIY birdseed ornaments make the perfect gifts for friends and family. They can be elegantly packaged with a few ornaments in each box and created in any shape you like.
They are also inexpensive to make yourself, but they look like an impressive and thoughtful project.
If you have a parent or teacher who is difficult to shop for, consider giving them birdseed ornaments to hang in their own backyards.
Looking to connect with like minded people who are interested in gardening, traditional living, and being more self sufficient? Join our community on Facebook – Not so Modern Living.
Conclusion
Birdseed ornaments are a lovely addition to any bird feeding station and can be customized with different shapes.
I hope these tips have helped you to create a beautiful array of birdseed ornaments for the birds in your yard.
These hanging birdseed ornaments will make great gifts for friends and family members!
Bird Seed Ornament Recipe
Homemade birdseed ornaments can be made in any shape you like to adorn your trees and bird feeding stations and benefit your song bird friends.
Materials
- Non-stick cooking spray or lard
- 2 metal spoons
- Heart shaped cookie cutter
- Parchment paper
- Medium sauce pan
- Disposable drinking straw
- Small Ziploc bag
- 1/4" red satin ribbon
Tools
- 1/2 c cold water
- 1 packet unflavored gelatin
- 3 Tbsp corn syrup
- 3/4 c flour
- 3 c Finch birdseed mix
- 1/2 c Nyjer seed
- 1/4 c natural peanut butter
Instructions
- In a medium saucepan, mix together cold water and gelatin. Let it set for 1 minute.
- Heat the saucepan over medium heat until the gelatin is completely dissolved.
- Stir the gelatin mixture constantly until it begins to bubble and thicken.
- Add the corn syrup to the boiling water and stir well. The mixture will continue to thicken as it cools down.
- Remove from heat and whisk in flour until it forms a paste.
- Using a greased metal spoon, mix in 3 c Finch birdseed mix.
- Line a cookie sheet with parchment paper.
- Place a greased heart-shaped cookie cutter on the parchment paper. Using two greased metal spoons, drop a couple spoonfuls of birdseed mix into the cookie cutter.
- Press the birdseed into the mold with the back of one of the metal spoons.
- Use a disposable drinking straw to create a hold for hanging the ornament, leaving space away from the edge of the ornament and making sure the hole goes all the way through. You may need to twist and wiggle the straw a little bit to move the bird seed out of the way.
- Squeeze the birdseed inside the straw back into the pan.
- Lift the cookie cutter off of the ornament, using the back of a spoon if necessary to keep the ornament on the parchment paper.
- Repeat this process until all of the birdseed mix is used. This recipe makes about 12 bird seed ornaments.
- Let the ornaments harden for at least 4 hours. I like to make them in the evening and let them set overnight.
- Place 1/4 c peanut butter in a small Ziploc bag. Make sure you use a peanut butter that does not contain any artificial sweeteners as they can be poisonous to animals.
- Squeeze the peanut butter into one corner of the bag and cut the tip off of the corner of the bag. Squeeze any extra air out of the bag and seal it shut.
- Sprinkle Nyjer seed over the peanut butter decorations. The Nyjer seed sticks to the peanut butter pretty easily, so you don't really need to press it down to make it stick.
- Gently shake any extra seed off of the ornament.
- Lace a piece of 1/4" red satin ribbon through the hole made by the drinking straw and hang your bird seed ornaments where your songbirds congregate.
Notes
Extra ornaments can be stored in a cool, dry place until ready for use. We put ours in the fridge just so the peanut butter wouldn't get soft and messy.
Recommended Products
As an Amazon Associate and member of other affiliate programs, I earn from qualifying purchases.
Looking to connect with like minded people who are interested in gardening, traditional living, and being more self sufficient? Join our community on Facebook – Not so Modern Living.


