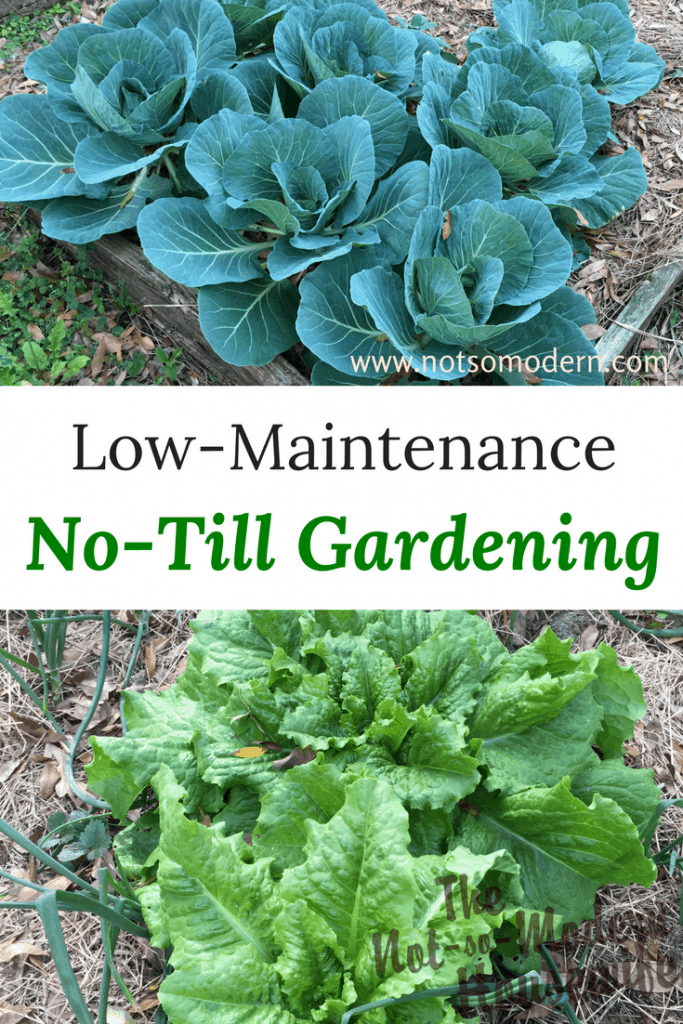
If you’re looking for an easy way to grow your own food without having to spend hours tilling and weeding, then no-till lasagna gardening might be the perfect solution. This method of gardening uses layers of organic material and cover crops to build up the soil over time, creating a nutrient-rich environment that supports healthy plants with minimal effort from you.
Gardening can be a challenging and time-consuming hobby that yields the most rewarding results. In recent years, no till lasagna gardening has grown in popularity amongst avid gardeners and beginners alike.
This innovative practice helps gardeners avoid the disadvantages of tilling soil, all while preserving the ecosystem and improving soil health. In this blog post, we will explore the various aspects of no till gardening and provide a step-by-step guide to help you transform your gardening experience.
Table of Contents

Disadvantages of Tilling Soil
While tilling fertile soil might seem like a necessary step for a healthy garden, it can actually cause some harm to your plants and the soil they grow in. When you till the soil, you inadvertently destroy the natural structure, reducing the soil’s ability to retain water and nutrients.
Tilling also kills beneficial microorganisms and earthworms, which are essential to maintaining the delicate balance of your garden’s ecosystem.
We may see an initial surge in growth following tilling due to the decomposition of those beneficial organisms in the soil, but in the long term we’ve destroyed a network designed by God to feed our plants and keep them healthy.

Benefits of No-Till Lasagna Gardening
No-till lasagna gardening eliminates the need for tilling by using layers of organic matter instead. This method allows air, water, and nutrients to penetrate deep into the soil without destroying its structure or killing off beneficial organisms. With this method, you can create a rich soil and environment that is tailored to your plants’ needs and work with the natural ecosystem instead of against it.
The layers of organic matter also help lock in moisture and reduce water loss from evaporation. This enables your garden to thrive even during periods of drought or other unfavorable conditions.
Do I need to dig up the grass before I start my lasagna garden?
No! You don’t need to dig up the existing grass, or till the soil. In fact, it’s best to avoid this step altogether in order to preserve the ecosystem of your garden. Instead, you can simply layer organic matter such as newspaper, leaves, compost and soil on top of your existing lawn. This will smother out any weeds or grass and provide a rich substrate for your plants to thrive in.
If you would like to kill the grass and weeds before you start, cover your intended garden area with a layer of black plastic 8-12 weeks before you intend to plant your garden. This will kill the weeds and ensure that they don’t regrow.

When to Build a Lasagna Bed
The best time to build a lasagna bed is in the fall or early spring before you plan to plant your garden. You will be planting in the top layers of mulch and compost, so building the lasagna garden layers before you put plants in the ground will ensure they aren’t buried too deep. Many plants should not be planted deeper than they were in the container they were growing in. Planting too deep can lead to fungal issues.
If you want to plant from seed, you’ll want to ensure they aren’t planted too deep in the soil because then they may fail to germinate. Always research the proper depth for the seeds you are planting. This information is usually included on the seed packet.

How to Start No-Till Lasagna Gardening
No till gardening is a smarter alternative to traditional tilling, as it maintains soil structure, retains valuable nutrients and preserves the integrity of the ecosystem. To start your journey, follow these simple steps:
- Choose a location: Select a suitable location for your lasagna garden, keeping in mind that the selected area should receive adequate sunlight and have good drainage.
Prepare the Site: Cut down any weeds or grass from your selected location and lay down a thick layer of newspaper or cardboard to serve as a base for your no-till garden. Do not use any glossy pages or boxes.
Build your lasagna layers: Start layering your garden with various organic materials, such as compost, grass clippings, leaves and kitchen waste. Alternate between green (nitrogen-rich) and brown (carbon-rich) materials, creating a balanced environment for your plants.

Building the Soil
Building healthy soil is the cornerstone of any successful no-till garden. The lasagna layering method not only contributes to soil fertility but also creates a rich and diverse habitat for beneficial microorganisms and earthworms. As the organic materials decompose, they release essential nutrients that promote plant growth and boost their resilience against pests and diseases.
The materials you use for your layers will break down and decompose, so you’ll want to add more compost and mulch and green layers every year. Your soil will continue to improve year after year thanks to this method.

Planting in Your Lasagna Garden
Once you’ve built your soil, it’s time to add the plants! You can plant seeds directly into the compost or use seedlings. Make sure to space them out according to their needs and provide adequate support for tall plants like tomatoes.
You’ll want to pull back mulch and cut into brown paper or cardboard so the seeds can germinate and seedlings can become established without competing with the mulch for sunlight.
As your plants grow, add a fresh layer of mulch to the bed to suppress weeds and retain moisture.
Lasagna Gardening in Raised Beds
If you’re looking to maximize your gardening space or simply love the convenience of raised garden beds, then you’re in luck. No-till lasagna gardening can be easily implemented in raised bed systems.
Start by constructing your raised bed and filling it with layers of organic materials, following the same principles as ground-based lasagna gardening. Lay a layer of cardboard or thick paper under the raised bed and fill most of the bed with sticks and branches.
You can continue to fill the bed with compost and mulch layers until the bed is mostly full, ensuring the top layer of the garden bed is 2-3 inches of mulch. When you’re finished, your raised bed will be ready for planting!
How soon can you plant in a lasagna garden?
Because of the nature of lasagna gardening, you can plant right away as soon as you’ve finished building your bed. The compost that is already present will feed your growing plants, while the mulch will continue to break down and feed the soil and plants later in the growing season.
Some gardeners are concerned that mulch will compete with their plants for nitrogen, but that is not the case with this layering method.
Nitrogen is only decreased in the thin layer between the soil and mulch. It won’t affect the roots of plants. Since the plants and seeds are planted in the compost layer, they are not effected by any possible nitrogen deficiency.
To get the most out of your lasagna garden, keep the mulch and compost layers damp but not soggy. This will ensure that beneficial microorganisms are able to do their job and help break down organic material into available nutrients for your plants.

Why do I see weed growing in my lasagna garden?
Weeds are a part of any landscape and lasagna gardening is no different. As with any garden, it’s important to keep an eye on the weeds in your lasagna garden.
Lasagna gardening will reduce the number of weeds in your garden, but it’s still possible for seeds to fall on the surface and take root. However, the roots are usually shallow and easy to pull up.
The key to weed control in a front lasagna garden bed is the same as any other: keep the bed mulched and free of debris so that sunlight can’t reach the soil and give weeds a place to take root.
If you already have weeds sprouting up, it’s best to pull them out by hand instead of using an herbicide so that you don’t risk damaging your plants.
Recommended Lasagna Gardening Books
If you’re looking to create a lasagna garden of your own, consider these books:

Lasagna Gardening by Patricia Lanza
This book revolutionized the approach to gardening for many, including those with difficult yards. This book focuses on composting, utilizing leaves and newspaper, as well as creating lasagna gardens that are easy to assemble and require minimal maintenance.
The book is clearly written, and the instructions are easy to follow.

Lasagna Gardening for Small Spaces by Patricia Lanza
This book provides additional information that perfectly complements the author's original book on lasagna gardening. The techniques from the original book have been successfully applied in many gardens, and can now also be used for container gardening.
It's valuable to add this book to your reference library, so you can refer back to it whenever you need. With the help of this book, you can create the garden you've always dreamed of, regardless of limited growing space. You can achieve impressive results in pots and small plots by using Patricia Lanza's lasagna gardening method.
With this process, you can grow plentiful and lovely gardens without any weeding or digging, even in beds as narrow as 4 inches.

Lasagna Gardening with Herbs by Patricia Lanza
This is ideal for busy individuals who want to enjoy the benefits of a garden but lack the time, energy, or confidence to engage in traditional gardening methods. The book outlines a clever process that helps you create stunning, fruitful, and easy-to-maintain herb gardens.
Both experienced and inexperienced gardeners will appreciate this resource. Lanza utilizes the layering system of gardening, which was previously introduced in her "lasagna gardening" books, to cultivate herbs. Her organic method involves using natural ingredients, close planting, generous mulching, and minimal equipment.

Lasagna Gardening by James Paris
This book is a great resource for novice gardeners as it provides planting instructions and harvesting information for the most common vegetables. Additionally, it includes detailed guidance on how to create your own lasagna garden and grow a variety of popular and easy vegetables.

All New Square Foot Gardening, 3rd Edition by Mel Bartholomew
If you're into gardening but concerned about the amount of space it requires for the plants you want to grow, then this book is a must-read. It provides a clear guide that you can follow and modify to suit your garden.
This book presents a straightforward, step-by-step approach to mastering gardening efficiently. Mel Bartholomew introduced Square Foot Gardening in 1981 as a new method to grow more fresh produce in a smaller space with less effort.
Over the years, millions of home gardeners have adopted this system and provided valuable feedback that has led to further refinement and improvements to meet the changing needs and challenges of today.

Permaculture Gardening Made Easy by Perennial Publishing
This book provides comprehensive information on how to plan a permaculture garden, covering everything from its history to practical implementation.
If you're new to gardening and wondering how to get started, this book is a great resource. It explains the concept of permaculture, which can help you create your garden effectively.

Permaculture Gardening Handbook by P. Joseph Richards
This book presents permaculture concepts in an easy to comprehend manner. It empowers readers to create their own permaculture garden and food forest.
The book teaches readers to plan their gardens smartly, avoiding overcommitment and ineffective planning.
Final Thoughts
Low-maintenance no-till lasagna gardening is an easy and sustainable way to improve your garden’s health while reducing the time and effort spent on garden chores. By adopting this method, you’ll not only reap the benefits of a thriving ecosystem but also contribute to a greener and more sustainable planet. Take this opportunity to try no-till lasagna gardening for yourself and watch your plants flourish like never before.